It is very important as a teacher that I set my students up for success. In the field of art our self-worth as artists can often be derived from our own judgement of how successful our art piece is, or how much we like it.
Therefore when I begin to plan a new art lesson I look for ways that I can help my students create a product of which they will be proud. With that in mind I taught a grade 6/7 class how to draw self portraits using a grid.
Lesson Plan
Subject: Art
Grade: 6/7
Title of Lesson: Van Gogh Portraits
Materials/Resources:
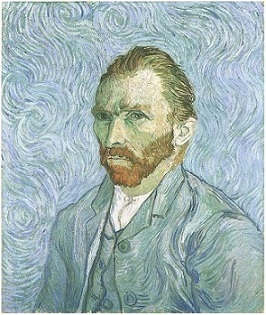
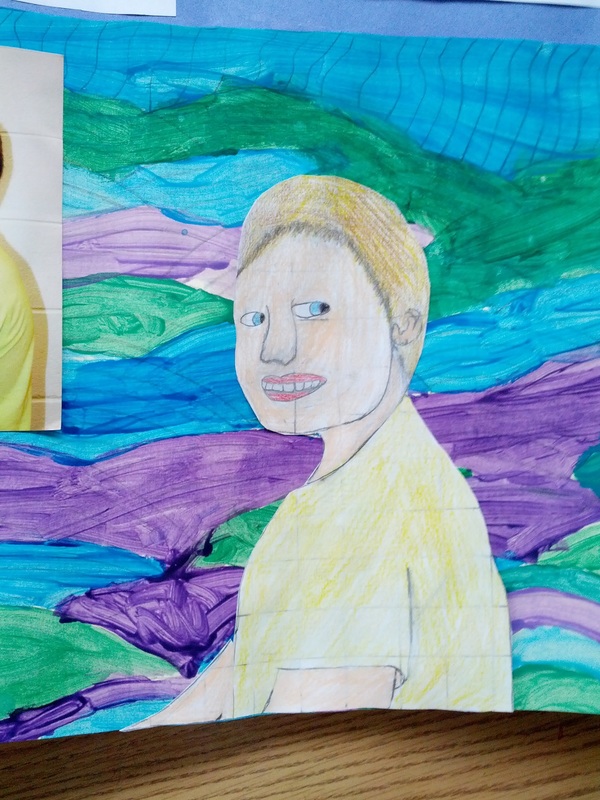
My associate teacher showed the students Van Gogh’s self portrait (attached to the end of the lesson). They analysed the piece paying special attention to his thick, swirling brushstrokes in the background. The students were then asked to draw in pencil on a thicker sheet of paper, a background for their own self portraits in the style of Van Gogh. Remind students that the lines should be spaced far enough apart that they will be able to paint them with a brush. The image of Van Gogh’s self portrait was left up on the smartboard so students could reference the image.
Self Portrait Drawing:
Step 1 - Find the major lines of your face and body, tracing them out with a marker (eyes, nose, hairline, torso). Students do not need to draw patterns or lettering on their clothing unless they want to.
Step 2 - Find the major highlights and shadows circling them, this will help when students begin to colour their portraits.
Step 3 - Draw a grid over the entire photocopied image. Model how to use registration marks to ensure a straight, consistent grid.
Step 4 - Draw a grid over the good copy.
Step 5 - Begin transferring the drawing square by square. Suggest students label the x axis with letters and the y axis with numbers on both grids to help students easily identify corresponding squares.
Step 6 - Once the drawing is finished erase any grid lines over the face and body. Colour in the drawing with pencil crayon. Students should use their original colour photos as a reference.
Step 7 - Cut out the self portrait as closely to the figure as possible and paste it on the background. Trim extra background if desired to create the best fit.
When teaching this lesson I used the smartboard with an image of a black and white portrait to show the students how to draw the major lines, highlights and shadows on their photocopies. I also demonstrated making a grid with registration marks and how to transfer using the grid. Using the grid helps students make accurate representations of themselves that are in proportion.
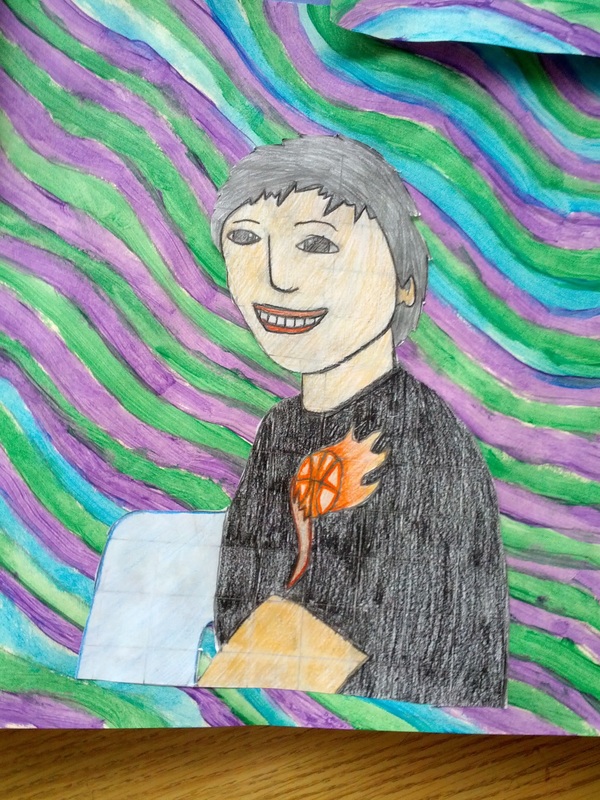
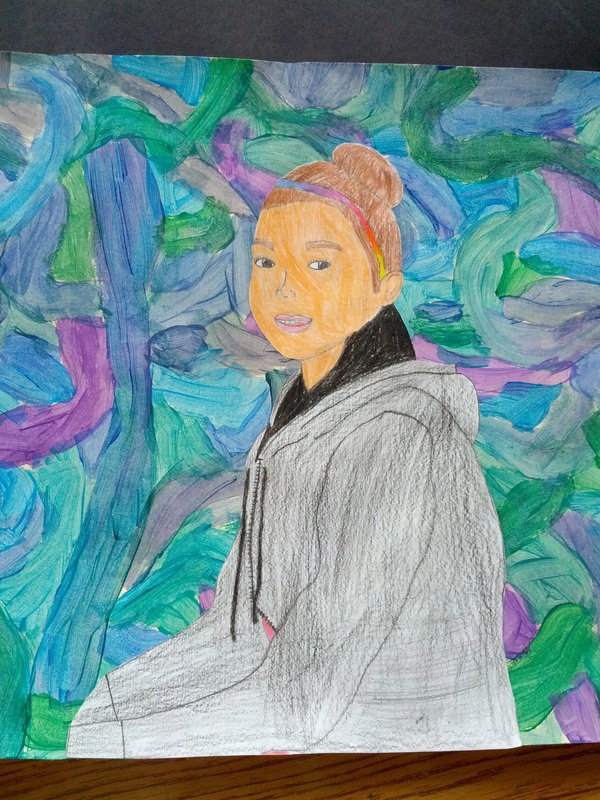
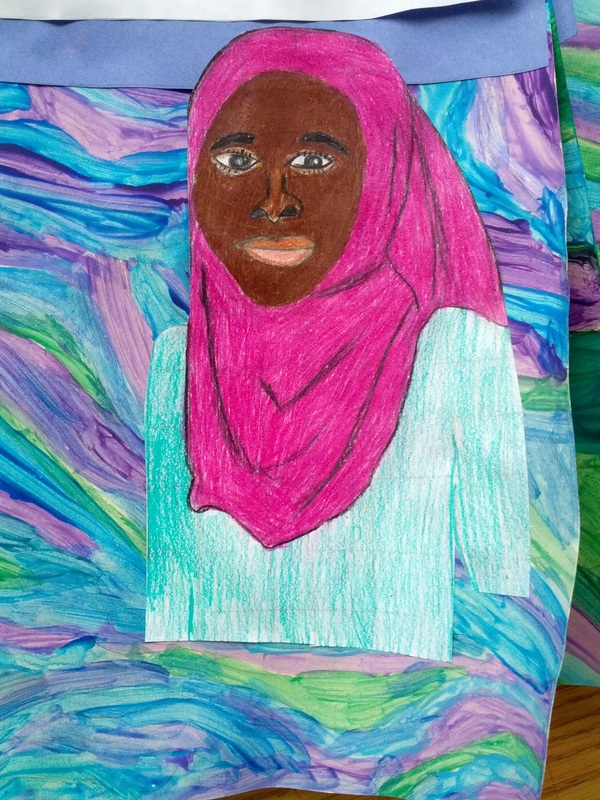
The students were able to clearly see the difference that the grid made in ensuring that the proportion was correct and that features were correctly aligned. The end products look very much like the students who created them.
Therefore when I begin to plan a new art lesson I look for ways that I can help my students create a product of which they will be proud. With that in mind I taught a grade 6/7 class how to draw self portraits using a grid.
Lesson Plan
Subject: Art
Grade: 6/7
Title of Lesson: Van Gogh Portraits
Materials/Resources:
- photos of all students
- photocopied blown up photos of all students
- thicker paper for painting
- thinner paper for drawing
- smartboard
- paint (cool colours)
- paintbrushes
- pencils
- pencil crayons
- markers (something that can be seen on the dark areas of a photocopied picture)
- ruler
- scissors
- glue
My associate teacher showed the students Van Gogh’s self portrait (attached to the end of the lesson). They analysed the piece paying special attention to his thick, swirling brushstrokes in the background. The students were then asked to draw in pencil on a thicker sheet of paper, a background for their own self portraits in the style of Van Gogh. Remind students that the lines should be spaced far enough apart that they will be able to paint them with a brush. The image of Van Gogh’s self portrait was left up on the smartboard so students could reference the image.
Self Portrait Drawing:
Step 1 - Find the major lines of your face and body, tracing them out with a marker (eyes, nose, hairline, torso). Students do not need to draw patterns or lettering on their clothing unless they want to.
Step 2 - Find the major highlights and shadows circling them, this will help when students begin to colour their portraits.
Step 3 - Draw a grid over the entire photocopied image. Model how to use registration marks to ensure a straight, consistent grid.
Step 4 - Draw a grid over the good copy.
Step 5 - Begin transferring the drawing square by square. Suggest students label the x axis with letters and the y axis with numbers on both grids to help students easily identify corresponding squares.
Step 6 - Once the drawing is finished erase any grid lines over the face and body. Colour in the drawing with pencil crayon. Students should use their original colour photos as a reference.
Step 7 - Cut out the self portrait as closely to the figure as possible and paste it on the background. Trim extra background if desired to create the best fit.
When teaching this lesson I used the smartboard with an image of a black and white portrait to show the students how to draw the major lines, highlights and shadows on their photocopies. I also demonstrated making a grid with registration marks and how to transfer using the grid. Using the grid helps students make accurate representations of themselves that are in proportion.
The students were able to clearly see the difference that the grid made in ensuring that the proportion was correct and that features were correctly aligned. The end products look very much like the students who created them.
  |   |


 RSS Feed
